前一段时间学习了node.js操作mongoDB数据库,现在追加一篇写接口的记录。
链接数据库
在项目根目录下安装Mongoose
npm install mongoose –save
利用mongoose来链接MongoDB 在项目中创建db.js文件:
1
2
3
4
5
6
7
8
9
10
11
12
13
14
15
16
17
18
19
20
21
22
23
24
25
26
27
28
29
| 'use strict';
import mongoose from 'mongoose';
mongoose.connect('mongodb://localhost:27017/test', { useNewUrlParser: true, useUnifiedTopology: true });
const db = mongoose.connection;
db.once('open' ,() => {
console.log(
'连接数据库成功'
);
})
db.on('error', function(error) {
console.error(
'Error in MongoDb connection: ' + error
);
mongoose.disconnect();
});
db.on('close', function() {
console.log(
'数据库断开,重新连接数据库'
);
});
export default db;
|
创建数据模型(建一张表)
在test数据库中创建一张名为StudentSchema的表,表中有name和age字段,并且公出。
1
2
3
4
5
6
7
8
9
10
11
| import mongoose from 'mongoose';
const StudentSchema = new mongoose.Schema({
name: String,
age: Number
})
const studentSchema = mongoose.model("StudentSchema",StudentSchema);
export default studentSchema;
|
接口路由搭建
添加body-parser依赖:
npm install body-parser
在app.js中引入:
1
2
3
4
5
| import bodyParser from 'body-parser';
app.use(bodyParser.urlencoded({extended:false}));
app.use(bodyParser.json());
|
新建一个js文件,用于写数据接口 req.body指的是URL中的参数,req.params指的是路径
1
2
3
4
5
6
7
8
9
10
11
12
13
14
15
16
17
18
19
20
21
22
23
24
25
26
27
28
29
30
31
32
33
34
35
36
37
38
39
40
41
42
43
44
45
46
47
48
49
50
51
52
53
54
55
56
57
58
59
60
61
62
63
64
| import express from 'express';
import studentInfo from './studentInfo';
const router = express.Router();
router.get("/test",(req,res)=>{
res.json({msg:"接收成功"});
})
router.post('/add',(req,res) => {
const Student = {};
if(req.body.name){
Student.name = req.body.name;
}
if(req.body.age){
Student.age = req.body.age;
}
new studentInfo(Student).save().then(user => {
res.json(user);
});
})
router.post('/delete',(req,res) => {
studentInfo.remove({_id:req.body.id}).then((result)=>{
res.json(result)
})
})
router.get('/:id',(req,res) => {
studentInfo.findOne({_id:req.params.id}).then(user => {
if(!user) {
return res.status(400).json("没有任何数据存在")
}
return res.json(user)
}).catch(err => {
return res.status(404).json(err)
})
})
router.post('/:id',(req,res) => {
const Student = {};
if(req.body.name){
Student.name = req.body.name;
}
if(req.body.age){
Student.age = req.body.age;
}
studentInfo.updateOne({ _id: req.params.id }, { $set: Student }).then(user => {
if (!user) {
return res.status(400).json("数据不存在");
}
res.json(user);
})
.catch(err => {
return res.status(404).json(err);
});
})
module.exports = router;
|
使用
在app.js中引入:
1
2
3
| import test from './test';
app.use(test);
|
利用Postman测试
POST测试:
将POST的body设置成x-www-form-urlencoded,下图为更新数据的接口示例: 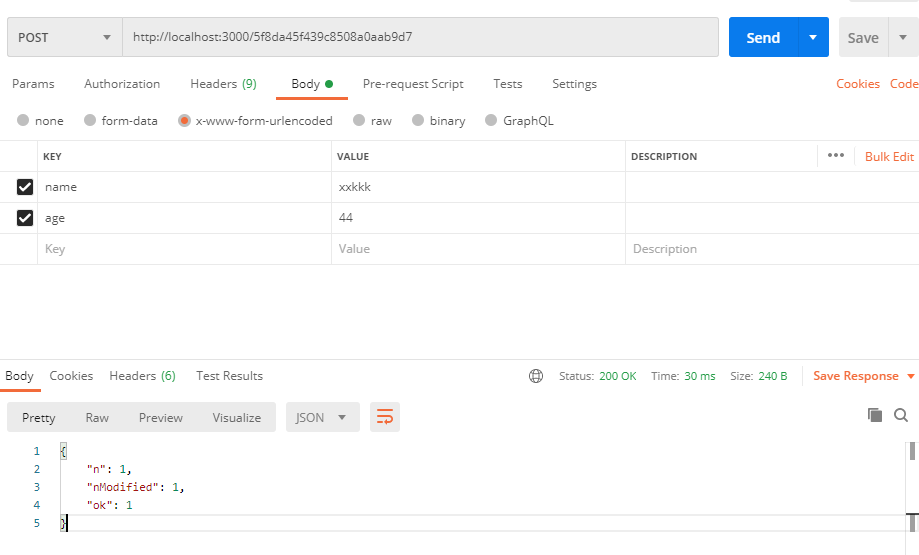
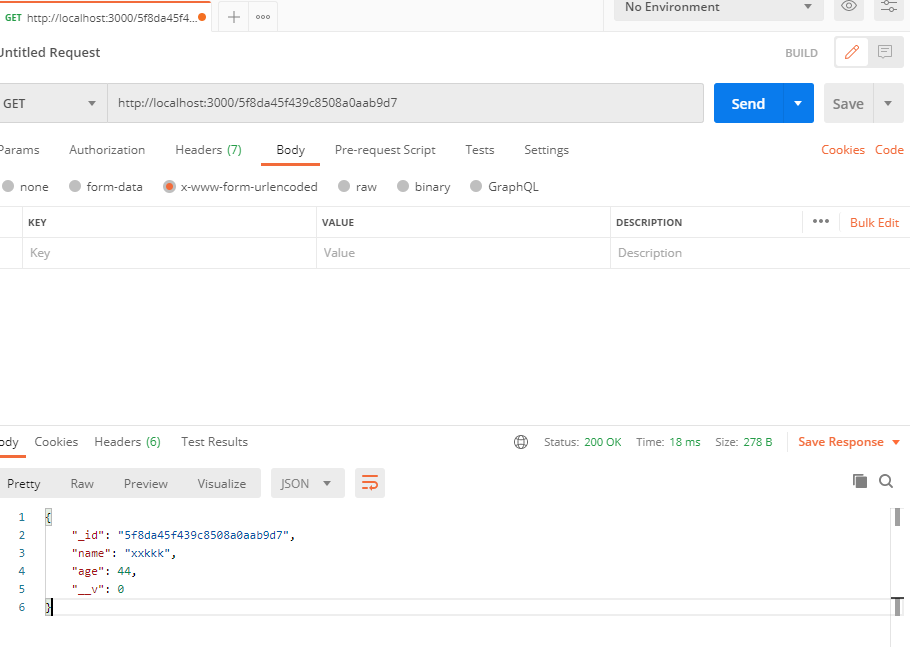
GET测试:
下图为根据ID获取一条数据的示例